


How to ensure the alignment of screws during installation?
Oct 08, 2025
Leave a message
Hey there! As a screws supplier, I've seen firsthand how crucial it is to ensure the alignment of screws during installation. Misaligned screws can lead to a whole host of problems, from wobbly furniture to structural failures. So, in this blog post, I'm going to share some tips and tricks on how to make sure your screws go in straight every time.
Understanding the Basics of Screw Alignment
Before we dive into the nitty - gritty of alignment, let's talk about why it matters. When a screw is properly aligned, it distributes the load evenly across the materials it's joining. This not only makes the joint stronger but also helps prevent damage to the materials. On the other hand, a misaligned screw can cause stress concentrations, which may lead to cracking, splitting, or loosening over time.


Tools for Ensuring Screw Alignment
- Screw Guides: These are simple but effective tools. A screw guide is basically a small tube or sleeve that you place over the hole where the screw will go. It helps keep the screw straight as you start driving it in. You can find screw guides in different sizes to match your screws.
- Drill Jigs: If you're using a power drill to install screws, a drill jig can be a game - changer. Drill jigs have pre - drilled holes at specific angles and distances, which ensure that your holes are in the right place and the screws will go in straight. They're especially useful when you need to drill multiple holes in a row.
- Right - Angle Attachments: For those hard - to - reach places or when you need to drive a screw at a 90 - degree angle, a right - angle attachment for your drill can help. It allows you to maintain proper alignment even in tight spaces.
Step - by - Step Guide to Aligning Screws
- Prepare the Materials: First, make sure the surfaces where you'll be installing the screws are clean and flat. Any debris or unevenness can throw off the alignment. If necessary, sand the surfaces to create a smooth finish.
- Mark the Holes: Use a pencil or a marker to mark the exact spots where you'll be drilling or inserting the screws. This gives you a clear target and helps you stay on track.
- Start Slowly: Whether you're using a hand tool or a power drill, start driving the screw in slowly. This gives you more control and allows you to correct any misalignment early on. Apply gentle pressure and keep an eye on the screw to make sure it's going in straight.
- Check for Alignment Regularly: As you drive the screw in, stop every few turns and check if it's still aligned. You can use a straightedge or your eye to make sure the screw is perpendicular to the surface. If it starts to go off - course, gently back it out a bit and realign it before continuing.
Specific Types of Screws and Alignment
- Manual Adjustment Screw: The Manual Adjustment Screw is often used for fine - tuning and precise adjustments. When installing these screws, it's even more important to ensure alignment. Since they're usually adjusted by hand, a misaligned screw can make it difficult to turn and may not function properly. Make sure to use a screw guide or take extra care when starting the screw.
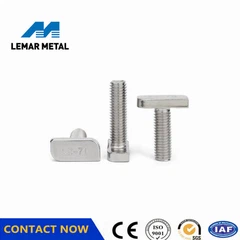
- Slotted Flat Head Machine Screw: Slotted Flat Head Machine Screw are commonly used in machinery and electronics. These screws need to be flush with the surface for a clean and professional look. To achieve this, use a drill bit that's the right size for the screw and a countersink bit to create a recess for the screw head. This will help keep the screw aligned and ensure it sits flat.
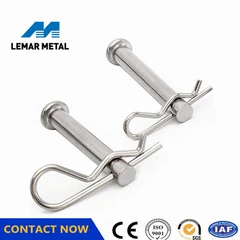
- Flat Head Knurled Thumb Screw: The Flat Head Knurled Thumb Screw is designed to be tightened and loosened by hand. Alignment is crucial here because a misaligned screw can be uncomfortable to turn and may not hold securely. When installing these screws, make sure to start them straight and use a gentle, even pressure as you tighten them.
Troubleshooting Alignment Issues
- If the Screw is Going in at an Angle: If you notice that the screw is starting to go in at an angle, stop immediately. Gently back the screw out and try again. You may need to clean the hole or adjust your tool to get a better start.
- Screw is Stripping: A misaligned screw can cause stripping, where the threads of the screw or the hole get damaged. If this happens, you may need to use a larger screw or repair the hole with a wood plug or a thread - repair kit.
- Screw Won't Go In All the Way: This could be due to misalignment or a blockage in the hole. Check the hole for debris and make sure the screw is going in straight. If necessary, use a drill bit to clear the hole.
Conclusion
Ensuring the alignment of screws during installation is not as hard as it may seem. With the right tools, a bit of patience, and following the steps I've outlined, you can achieve professional - looking results every time. Whether you're a DIY enthusiast or a professional contractor, proper screw alignment can save you time, money, and headaches in the long run.
If you're in the market for high - quality screws, we've got you covered. We offer a wide range of screws, including the ones mentioned above, to meet all your needs. If you have any questions or want to discuss your specific requirements, don't hesitate to reach out. We're here to help you find the perfect screws for your project and ensure a smooth installation process.
References
- Woodworking Magazine, "Best Practices for Screw Installation"
- Machinery Handbook, Chapter on Fasteners and Their Installation
- Online DIY Forums, User - Generated Tips on Screw Alignment
Send Inquiry