
How do I adjust a latchclip?
May 16, 2025
Leave a message
As a supplier of latchclips, I often receive inquiries from customers about how to adjust these essential hardware components. Latchclips play a crucial role in various applications, from industrial machinery to household appliances, ensuring secure fastening and easy access. In this blog post, I'll share some detailed steps and tips on how to adjust a latchclip effectively.
Understanding the Basics of Latchclips
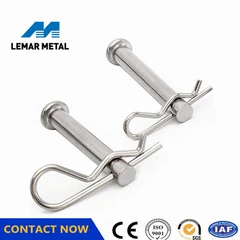
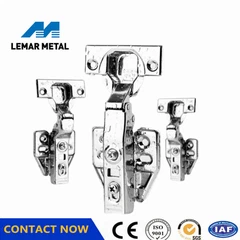
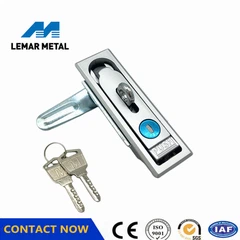
Before we dive into the adjustment process, it's important to understand the different types of latchclips available. Two common types that we supply are the Paddle Handle Latch and the Catch Toggle Clamp.
The Paddle Handle Latch is known for its simplicity and ease of use. It typically consists of a paddle-shaped handle that, when turned, engages or disengages the latch mechanism. This type of latch is commonly used in cabinets, drawers, and access panels.
On the other hand, the Catch Toggle Clamp offers a more secure and reliable fastening solution. It uses a toggle mechanism to lock and unlock, providing a strong clamping force. This makes it ideal for applications where vibration or movement is a concern, such as in automotive or industrial equipment.
Tools Required for Adjustment
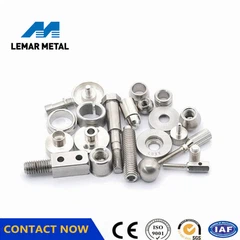
To adjust a latchclip, you'll need a few basic tools. These include a screwdriver (either flathead or Phillips, depending on the type of screws used), a wrench (if the latchclip has nuts or bolts), and a pair of pliers. It's also a good idea to have a measuring tape or ruler on hand to ensure accurate adjustments.
Step-by-Step Guide to Adjusting a Latchclip
Step 1: Identify the Problem
The first step in adjusting a latchclip is to identify the problem. Is the latch not closing properly? Is it too loose or too tight? Does it not engage or disengage smoothly? By pinpointing the issue, you can determine the appropriate adjustment method.

Step 2: Inspect the Latchclip
Once you've identified the problem, carefully inspect the latchclip for any signs of damage or wear. Look for bent or broken parts, loose screws, or excessive rust. If you notice any damage, it may be necessary to replace the latchclip rather than attempting to adjust it.
Step 3: Loosen the Mounting Screws
Most latchclips are secured to the surface using screws. Use a screwdriver to loosen these screws, but don't remove them completely. This will allow you to make small adjustments to the position of the latchclip.
Step 4: Adjust the Position
If the latchclip is not aligning properly with the strike plate or catch, you can adjust its position. Gently move the latchclip up, down, left, or right until it aligns correctly. Use a measuring tape or ruler to ensure that the adjustment is accurate.
Step 5: Tighten the Mounting Screws
Once you've adjusted the position of the latchclip, use a screwdriver to tighten the mounting screws. Make sure that the latchclip is securely fastened to the surface.
Step 6: Test the Latchclip
After tightening the mounting screws, test the latchclip to see if the problem has been resolved. Open and close the door, drawer, or panel several times to ensure that the latchclip engages and disengages smoothly. If the problem persists, you may need to make further adjustments.
Step 7: Adjust the Tension
If the latchclip is too loose or too tight, you can adjust the tension. Some latchclips have a built-in adjustment mechanism, such as a screw or nut, that allows you to increase or decrease the tension. Use a screwdriver or wrench to make the necessary adjustments.

Step 8: Lubricate the Latchclip
Over time, latchclips can become dry and sticky, which can affect their performance. To keep the latchclip operating smoothly, apply a small amount of lubricant to the moving parts. You can use a silicone-based lubricant or a light machine oil.
Tips for Adjusting Latchclips
- Always follow the manufacturer's instructions when adjusting a latchclip. Different types of latchclips may require different adjustment methods.
- If you're unsure how to adjust a latchclip, consult a professional or contact the supplier for assistance.
- Regularly inspect and maintain your latchclips to ensure optimal performance. This includes cleaning the latchclip and lubricating the moving parts.
- When adjusting a latchclip, make small adjustments at a time and test the latchclip after each adjustment. This will help you avoid over-adjusting and causing further problems.
Conclusion
Adjusting a latchclip is a relatively simple process that can be done with a few basic tools. By following the steps outlined in this blog post, you can ensure that your latchclips are properly adjusted and functioning smoothly. Whether you're using a Paddle Handle Latch or a Catch Toggle Clamp, proper adjustment is essential for secure fastening and easy access.
If you have any questions or need further assistance with adjusting your latchclips, please don't hesitate to contact us. We're a leading supplier of high-quality latchclips and can provide you with the support and guidance you need. We're also happy to discuss your specific requirements and help you find the right latchclip for your application. Whether you're in the industrial, automotive, or household sector, we have the expertise and products to meet your needs. So, don't wait any longer - reach out to us today to start a conversation about your latchclip needs and explore the possibilities of working together.
References
- Hardware Installation and Maintenance Guides
- Latchclip Manufacturer's Documentation
Send Inquiry