How to replace a damaged pipe clip?
Dec 29, 2025
Leave a message
How to Replace a Damaged Pipe Clip
Pipe clips are essential components in various plumbing and piping systems, providing support and stability to pipes. Over time, these clips can become damaged due to factors such as corrosion, wear and tear, or improper installation. Replacing a damaged pipe clip is a relatively straightforward process that can prevent further issues and ensure the proper functioning of your piping system. As a pipe clip supplier, I'm here to guide you through the steps of replacing a damaged pipe clip.
Step 1: Identify the Type of Pipe Clip
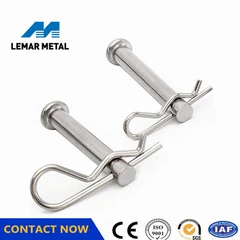
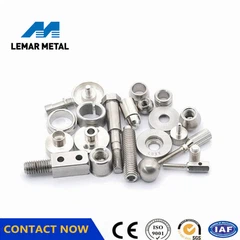
Before you begin the replacement process, it's crucial to identify the type of pipe clip you need to replace. There are several types of pipe clips available, each designed for specific applications and pipe sizes. Some common types of pipe clips include Pipe Throat Band Screw, Double Wire Throat Hoop, and Hose Clamp Hoop.
Examine the damaged pipe clip closely to determine its type, size, and material. This information will help you select the appropriate replacement clip. If you're unsure about the type of pipe clip you need, you can refer to the manufacturer's documentation or consult with a professional plumber.


Step 2: Gather the Necessary Tools and Materials
Once you've identified the type of pipe clip you need to replace, gather the necessary tools and materials. Here's a list of items you'll typically need:
- Replacement pipe clip
- Screwdriver or wrench (depending on the type of clip)
- Measuring tape
- Safety gloves
- Safety glasses
Make sure you have the correct size and type of replacement pipe clip. It's also a good idea to have a few extra clips on hand in case you encounter any issues during the replacement process.
Step 3: Turn Off the Water Supply
Before you start working on the pipe clip, it's important to turn off the water supply to the affected area. This will prevent any water from leaking out and causing damage. Locate the main water shut-off valve for your home or building and turn it clockwise to shut off the water.
If you're working on a specific section of the piping system, you may be able to turn off the water supply to that section only. Look for a shut-off valve near the damaged pipe clip and turn it off.
Step 4: Remove the Damaged Pipe Clip
Using a screwdriver or wrench, carefully remove the damaged pipe clip from the pipe. Depending on the type of clip, you may need to loosen a screw or nut to release the clip. Be gentle when removing the clip to avoid damaging the pipe or other components.
Once the clip is removed, inspect the pipe for any signs of damage or wear. If you notice any cracks, leaks, or other issues, you may need to repair or replace the pipe before installing the new clip.
Step 5: Measure the Pipe Size
Before installing the new pipe clip, measure the diameter of the pipe to ensure you select the correct size clip. Use a measuring tape to measure the outside diameter of the pipe at the point where the clip will be installed.
Refer to the manufacturer's specifications for the replacement pipe clip to determine the appropriate size based on your measurements. Make sure the clip is a snug fit around the pipe but not too tight, as this can cause damage to the pipe.
Step 6: Install the New Pipe Clip
Place the new pipe clip around the pipe at the same location as the damaged clip. Make sure the clip is centered and aligned properly. If the clip has a screw or nut, use a screwdriver or wrench to tighten it securely. Be careful not to over-tighten the clip, as this can cause damage to the pipe or the clip itself.
If the clip is a type that requires a special installation method, such as a hose clamp hoop, follow the manufacturer's instructions carefully. Some clips may need to be adjusted or tightened using a specific tool or technique.
Step 7: Check for Leaks
Once the new pipe clip is installed, turn on the water supply and check for any leaks. Look for any signs of water dripping or spraying from the pipe or the clip. If you notice any leaks, turn off the water supply again and tighten the clip further or make any necessary adjustments.
If the leak persists, you may need to remove the clip and check for any damage to the pipe or the clip. You may also need to replace the clip with a different size or type.
Step 8: Test the Piping System
After you've checked for leaks and ensured that the new pipe clip is installed correctly, test the piping system to make sure it's functioning properly. Turn on the faucets or other fixtures connected to the affected area and check for any water flow issues.
If you notice any problems, such as low water pressure or a strange noise, turn off the water supply and investigate the issue further. You may need to consult with a professional plumber if you're unable to resolve the problem on your own.
Step 9: Dispose of the Damaged Pipe Clip
Once you've successfully replaced the pipe clip and tested the piping system, dispose of the damaged pipe clip properly. Check with your local waste management facility for guidelines on how to dispose of metal or plastic pipe clips.
If the damaged pipe clip is made of a recyclable material, you may be able to recycle it. Look for recycling centers or programs in your area that accept metal or plastic items.
Step 10: Maintain Your Piping System
To prevent future damage to your pipe clips and piping system, it's important to maintain them regularly. Here are some tips for maintaining your piping system:
- Inspect your pipes and pipe clips regularly for signs of damage or wear.
- Replace any damaged or worn-out pipe clips as soon as possible.
- Keep your pipes clean and free of debris.
- Avoid using harsh chemicals or abrasive cleaners on your pipes.
- Have your plumbing system inspected by a professional plumber at least once a year.
By following these maintenance tips, you can extend the lifespan of your pipe clips and piping system and prevent costly repairs.
Conclusion
Replacing a damaged pipe clip is a simple process that can be done by most homeowners with basic DIY skills. By following the steps outlined in this guide, you can safely and effectively replace a damaged pipe clip and ensure the proper functioning of your piping system.
As a pipe clip supplier, we offer a wide range of high-quality pipe clips to meet your needs. If you're in the market for replacement pipe clips or have any questions about our products, please don't hesitate to contact us. We're here to help you find the right solutions for your plumbing needs.
Whether you're a professional plumber or a DIY enthusiast, we're committed to providing you with the best products and services. Our team of experts is available to assist you with product selection, installation advice, and any other questions you may have.
If you're interested in purchasing pipe clips from us, please reach out to us for more information. We look forward to working with you and helping you keep your piping system in top condition.
References
- "Plumbing Basics: How to Replace a Pipe Clip." Family Handyman.
- "Pipe Clips: Types, Installation, and Maintenance." The Spruce.
- Manufacturer's documentation for pipe clips.
Send Inquiry