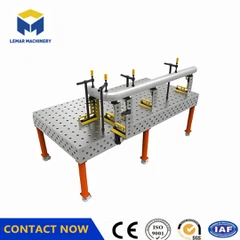


How to Pre-tighten a 3D Welding Table?
Feb 13, 2026
Leave a message
Preparation Before Pre-tightening
1. Environment and Tools: Find a flat, firm, vibration-free surface. Prepare a level (electronic or bubble level), wrench, and washers.
2. Platform Inspection: Clean the work surface and check the outriggers and support bolts for damage. Ensure the platform can be adjusted freely.
Pre-tightening Operation Steps
1. Initial Leveling: Place the platform and adjust the outriggers to make it roughly level.
2. Precise Adjustment: Use a level to measure the platform horizontally and vertically. Lower the corresponding outrigger if any part is too high, until the bubble is centered.
3. Cross-Verification: Adjust along the diagonals to ensure the platform is level and not twisted.
Precautions
1. Safety First: Avoid slipping during adjustment to prevent the platform from tipping over.
2. Gradual Adjustment: Make small adjustments each time, avoiding large adjustments at once to prevent introducing new errors.
3. Regular Checks: Even after leveling, regular checks are necessary, as changes may occur over time.
Why is Pre-tightening Necessary?
1. Ensuring Accuracy: A level platform is fundamental to welding accuracy and reduces weld defects.
2. Improving Stability: Reduces vibration, making welding more stable.
3. Extending Lifespan: Prevents excessive localized stress and protects the platform structure.

Send Inquiry