How do I remove a latchclip?
Jun 24, 2025
Leave a message
Hey there! As a latchclip supplier, I often get asked about how to remove a latchclip. It might seem like a simple task, but there are some key steps and things to keep in mind. In this blog, I'll walk you through the process, sharing some tips and tricks along the way.
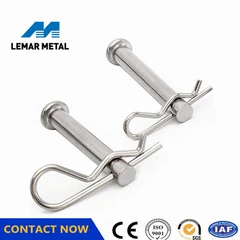
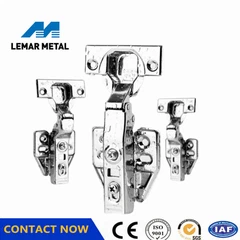
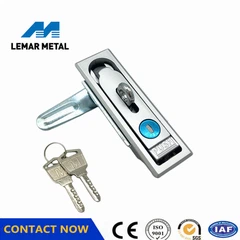
First off, let's understand what a latchclip is. A latchclip is a small but mighty piece of hardware used to secure two objects together. It's commonly found in various applications, from cabinets and drawers to automotive and industrial equipment. There are different types of latchclips, such as the Paddle Handle Latch and the Catch Toggle Clamp. Each type has its own unique design and function, which can affect the removal process.
Tools You'll Need
Before you start removing a latchclip, it's important to gather the right tools. The most common tools you'll need include:
- Screwdriver: Depending on the type of latchclip, you might need a Phillips head or flathead screwdriver. This is used to remove any screws holding the latchclip in place.
- Pliers: Pliers can be handy for gripping and pulling out stubborn latchclips, especially those with a tight fit.
- Allen wrench: Some latchclips use Allen screws, so having the appropriate size Allen wrench is essential.
Step-by-Step Removal Process
Now, let's get into the actual process of removing a latchclip. The steps can vary depending on the type of latchclip and its installation, but here's a general guide:
Step 1: Identify the Type of Latchclip
As mentioned earlier, different types of latchclips require different removal methods. Take a close look at the latchclip and determine whether it's a screw-mounted, snap-on, or toggle-type latchclip. This will help you choose the right approach.
Step 2: Prepare the Work Area
Before you start removing the latchclip, make sure the work area is clean and free of any debris. This will prevent any small parts from getting lost or damaged during the removal process. You might also want to lay down a cloth or towel to catch any loose screws or parts.
Step 3: Remove the Screws (if applicable)
If the latchclip is held in place by screws, use the appropriate screwdriver to remove them. Start by loosening the screws gradually, being careful not to strip the screw heads. Once the screws are removed, set them aside in a safe place.
Step 4: Detach the Latchclip
Depending on the type of latchclip, you'll need to use different techniques to detach it. Here are some common methods:
- Snap-on Latchclips: For snap-on latchclips, you can use a flathead screwdriver or a pry tool to gently pry the latchclip away from the surface. Start at one end and work your way around, applying even pressure to avoid damaging the latchclip or the surrounding area.
- Toggle-Type Latchclips: Toggle-type latchclips usually have a lever or handle that needs to be moved to release the latch. Simply move the lever or handle to the unlocked position, and the latchclip should come loose.
- Screw-Mounted Latchclips: Once the screws are removed, you can usually lift the latchclip off the surface. If it's a bit stubborn, you can use pliers to grip the latchclip and gently pull it away.
Step 5: Inspect the Latchclip and the Installation Area
After removing the latchclip, take a moment to inspect it for any signs of damage or wear. Check the installation area as well to make sure there are no loose screws or debris. If the latchclip is damaged, you might need to replace it with a new one.
Tips and Tricks
Here are some additional tips and tricks to make the removal process easier and more efficient:


- Use Lubrication: If the latchclip is stuck or difficult to remove, you can apply a small amount of lubricant, such as WD-40, to the area. This will help loosen the latchclip and make it easier to detach.
- Be Patient: Removing a latchclip can sometimes be a frustrating process, especially if it's a tight fit. Take your time and be patient, and avoid using excessive force, as this can damage the latchclip or the surrounding area.
- Keep Track of the Parts: As you remove the latchclip and any associated parts, make sure to keep them organized and in one place. This will make it easier to reinstall the latchclip later if needed.
When to Seek Professional Help
In some cases, removing a latchclip can be more complicated than expected, especially if it's a specialized or high-security latchclip. If you're unsure about how to remove the latchclip or if you encounter any problems during the process, it's best to seek professional help. A locksmith or a hardware expert can provide you with the guidance and assistance you need to safely remove the latchclip.
Conclusion
Removing a latchclip might seem like a simple task, but it requires some knowledge and the right tools. By following the steps outlined in this blog and using the tips and tricks provided, you should be able to remove a latchclip safely and efficiently. Remember, if you're ever in doubt, don't hesitate to seek professional help.
If you're in the market for high-quality latchclips or other hardware products, we're here to help. As a leading latchclip supplier, we offer a wide range of latchclips to meet your needs. Whether you're looking for a Paddle Handle Latch or a Catch Toggle Clamp, we've got you covered. Contact us today to discuss your requirements and start a procurement conversation.
References
- General knowledge of latchclip installation and removal from years of experience in the hardware industry.
Send Inquiry