


How do I design a 3D - printable washer?
Jun 11, 2025
Leave a message
As a washer supplier, I've had the privilege of exploring various aspects of washer design, especially in the realm of 3D printing. The ability to create 3D - printable washers offers numerous advantages, such as customization, rapid prototyping, and cost - effectiveness. In this blog, I'll share my insights on how I design a 3D - printable washer.
Understanding the Basics of Washers
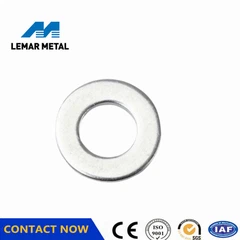
Before delving into the design process, it's crucial to understand what a washer is and its functions. Washers are thin plates, typically with a hole in the center, used to distribute the load of a threaded fastener, such as a bolt or a nut. They prevent damage to the surface being fastened, reduce vibration, and provide a more secure connection.
There are different types of washers, including flat washers, spring washers, and locking washers. For example, E Clip Retaining Lock Washer is a type of locking washer that provides excellent resistance against loosening due to vibration. Another example is the Retaining Ring E - Clip, which is used to hold components on a shaft or in a bore. The Din 6799 E Clip is a standardized e - clip that follows specific dimensional and quality standards.
Defining the Requirements
The first step in designing a 3D - printable washer is to define the requirements. This involves considering factors such as the application, the load it will bear, the material it will be made of, and the size and shape specifications.
Application
The application of the washer determines its design features. For example, if the washer is to be used in a high - vibration environment, a locking washer design might be more appropriate. If it's for a simple load - distributing purpose, a flat washer could suffice.
Load - Bearing Capacity
Understanding the load that the washer will need to bear is essential. This includes both the static load (the weight or force that remains constant) and the dynamic load (the force that changes over time, such as vibration or shock). The material and thickness of the washer are directly related to its load - bearing capacity.
Material Selection
The choice of material for 3D - printing the washer is crucial. Common materials for 3D printing include plastics like PLA (Polylactic Acid), ABS (Acrylonitrile Butadiene Styrene), and PETG (Polyethylene Terephthalate Glycol - modified). Each material has its own properties, such as strength, flexibility, and chemical resistance. For example, PLA is a biodegradable and easy - to - print material, but it may not be as strong as ABS. If the washer needs to withstand high temperatures or harsh chemicals, a more specialized material might be required.
Size and Shape
The size and shape of the washer are determined by the fastener it will be used with and the space available in the application. The inner diameter of the washer should match the diameter of the bolt or screw, while the outer diameter should be large enough to distribute the load effectively. The thickness of the washer also affects its performance.
Designing the Washer
Once the requirements are defined, it's time to start designing the washer using 3D modeling software. There are several software options available, such as Fusion 360, Tinkercad, and Blender.
Creating the Basic Shape
The first step in the design process is to create the basic shape of the washer. For a flat washer, this involves creating a circular disc with a hole in the center. In Fusion 360, for example, you can use the "Sketch" tool to draw a circle for the outer diameter and another circle for the inner diameter. Then, use the "Extrude" tool to give the washer its thickness.
Adding Features
Depending on the requirements, additional features can be added to the washer. For a locking washer, you might add teeth or ridges to prevent the fastener from loosening. These features can be created using the "Revolve", "Sweep", or "Loft" tools in the 3D modeling software.
Adjusting Dimensions
After creating the basic shape and adding features, it's important to adjust the dimensions to meet the specified requirements. Double - check the inner and outer diameters, the thickness, and the size of any additional features. Make sure the dimensions are accurate to ensure a proper fit and function.
Testing the Design
Before printing the washer, it's a good idea to test the design virtually. Most 3D modeling software allows you to perform simulations to check the strength and performance of the washer under different loads. This can help identify any potential issues with the design and make necessary adjustments.
Preparing for 3D Printing
Once the design is finalized, it's time to prepare it for 3D printing. This involves slicing the 3D model into layers and generating the G - code, which is the set of instructions that the 3D printer uses to create the object.
Slicing the Model
There are several slicing software options available, such as Cura, PrusaSlicer, and Simplify3D. These software programs allow you to adjust settings such as layer height, infill density, and print speed. The layer height determines the resolution of the printed object, while the infill density affects its strength and weight.
Generating G - code
After slicing the model, the software will generate the G - code. This code contains information about the movement of the printer head, the extrusion of the material, and other parameters. Save the G - code file and transfer it to the 3D printer.
Printing and Post - Processing
Now it's time to print the washer. Load the appropriate material into the 3D printer and start the printing process. The printing time will depend on the size and complexity of the washer, as well as the settings used in the slicing software.
Post - Processing
After the printing is complete, the washer may require some post - processing. This can include removing any support structures, sanding the surface to smooth it out, and applying a finish if necessary. Post - processing can improve the appearance and performance of the printed washer.
Quality Control
Once the washer is printed and post - processed, it's important to perform quality control checks. This involves measuring the dimensions of the washer to ensure they match the design specifications. You can use calipers or a micrometer to measure the inner and outer diameters, the thickness, and other critical dimensions.


Also, test the washer's performance. If it's a locking washer, check its ability to prevent the fastener from loosening. If it's a load - distributing washer, test its ability to withstand the specified load without deformation.
Conclusion
Designing a 3D - printable washer is a multi - step process that requires careful consideration of the requirements, accurate design using 3D modeling software, proper preparation for 3D printing, and thorough quality control. As a washer supplier, I've found that 3D printing offers a great way to create custom - designed washers quickly and cost - effectively.
If you're interested in purchasing high - quality washers or have specific design requirements, I encourage you to reach out for a procurement discussion. We can work together to find the best washer solutions for your needs.
References
- "3D Printing Handbook" by Ian Gibson, David W. Rosen, and Brent Stucker
- "Mechanical Engineering Design" by Joseph E. Shigley, Charles R. Mischke, and Richard G. Budynas
Send Inquiry