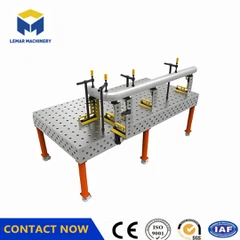


What are the steps for precision adjustment of a 3D welding table?
Jan 26, 2026
Leave a message
I. Preparation before precision adjustment
1. Environmental preparation: Perform the adjustment in a constant temperature (20±2℃) and vibration-free environment to avoid the impact of thermal expansion and contraction and vibration on precision.
2. Cleaning the working surface: Thoroughly remove oil, rust, and welding slag to ensure the reference surface is clean.
3. Inspection and evaluation: Measure flatness, scratch depth, etc., to determine the degree of wear and the adjustment range.
II. Core steps of precision adjustment
1. Coarse scraping: Use a long scraper to remove severe unevenness and machining marks, aiming to form uniform grinding points (4-6 points/25mm×25mm).
2. Fine scraping: Use a short scraper to disperse the grinding points and improve surface quality, aiming to achieve 10-14 points/25mm×25mm.
3. Fine scraping: Use a small scraper to form a fine mesh pattern, ensuring flatness ≤0.01mm/500mm² and surface roughness Ra0.8-Ra1.6.
4. Inspection and Adjustment: Inspect contact points using the coloring method, make local repairs, and ensure that flatness and contact point density meet the standards.
III. Acceptance After Precision Adjustment
1. Flatness: Meets the original precision grade (e.g., Grade 0 ≤ 0.01mm/m, Grade 1 ≤ 0.02mm/m).
2. Contact Point Density: Precision and dense grade platforms ≥ 12 points/25mm×25mm, ordinary grade ≥ 6 points.
3. Tank Accuracy: T-slot verticality and spacing tolerance meet design requirements.
IV. Professional Recommendations
1. Engage a Professional Organization: It is recommended to find a qualified manufacturer or repair center, as they have professional tools and experience.
2. Regular Maintenance: Conduct precision checks quarterly and perform timely inspections after high-load use.

Send Inquiry