


How do I ensure a latchclip is properly locked?
Jul 15, 2025
Leave a message
As a dedicated supplier of latchclips, ensuring that our products are properly locked is not just a technical requirement but a commitment to our customers' safety and satisfaction. In this blog, I'll share some essential steps and considerations to guarantee a latchclip is securely fastened.
Understanding the Basics of Latchclips
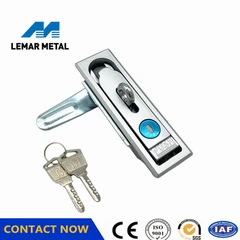
Before delving into the locking process, it's crucial to understand what latchclips are and how they work. Latchclips are mechanical devices designed to hold two or more parts together. They come in various types, each with its unique mechanism and application. For instance, the Paddle Handle Latch is commonly used in cabinets and enclosures, providing a simple yet effective way to secure doors. On the other hand, the Catch Toggle Clamp is ideal for applications that require quick and repetitive locking, such as in manufacturing jigs and fixtures.
Pre - installation Checks
The first step in ensuring a latchclip is properly locked starts even before installation.
- Inspect the Latchclip: Carefully examine the latchclip for any visible damage, such as cracks, bends, or missing parts. A damaged latchclip may not function correctly and could compromise the security of the connection.
- Check the Mounting Surface: The surface where the latchclip will be installed should be flat, clean, and free of debris. Any irregularities on the mounting surface can prevent the latchclip from sitting flush, leading to an improper lock.
- Verify Compatibility: Ensure that the latchclip is compatible with the parts it will be joining. Consider factors such as the material, thickness, and size of the components. Using an incompatible latchclip can result in a weak or unstable connection.
Installation Process
Proper installation is key to a secure lock.
- Follow the Manufacturer's Instructions: Every latchclip comes with specific installation guidelines. These instructions are designed to ensure optimal performance and safety. Make sure to read and follow them carefully.
- Use the Right Tools: Using the appropriate tools for installation is essential. For example, if the latchclip requires screws for mounting, use a screwdriver that fits the screw heads properly. Using the wrong tools can damage the latchclip or the mounting surface.
- Tighten Securely: When attaching the latchclip, ensure that all fasteners are tightened securely. However, be careful not to overtighten, as this can cause the latchclip to warp or break. A good rule of thumb is to tighten the fasteners until they are snug but not overly tight.
Locking the Latchclip
Once the latchclip is installed, it's time to lock it.
- Understand the Locking Mechanism: Different types of latchclips have different locking mechanisms. For example, some latchclips may require a simple push - and - turn motion, while others may need to be engaged using a lever or a key. Familiarize yourself with the specific locking mechanism of the latchclip you are using.
- Ensure Full Engagement: To achieve a proper lock, the latchclip must be fully engaged. This means that all moving parts of the latchclip should be in their correct positions. For instance, if the latchclip has a hook or a catch, make sure it is firmly seated in its corresponding slot.
- Test the Lock: After locking the latchclip, give it a gentle tug or shake to test its security. If the latchclip feels loose or moves easily, it may not be properly locked. In this case, re - check the locking mechanism and make any necessary adjustments.
Regular Maintenance
To keep the latchclip functioning properly over time, regular maintenance is required.
- Clean the Latchclip: Periodically clean the latchclip to remove dirt, dust, and debris. Use a mild detergent and a soft cloth to avoid scratching the surface. A clean latchclip will operate more smoothly and have a longer lifespan.
- Lubricate Moving Parts: If the latchclip has moving parts, such as hinges or levers, lubricate them regularly with a suitable lubricant. This will reduce friction and wear, ensuring that the locking mechanism remains reliable.
- Inspect for Wear and Tear: Regularly inspect the latchclip for signs of wear and tear, such as rust, corrosion, or excessive wear on the moving parts. If any damage is detected, replace the latchclip immediately to prevent a potential failure.
Quality Control and Assurance
As a latchclip supplier, we have a rigorous quality control process in place to ensure that every product meets the highest standards.
- Material Selection: We use only high - quality materials in the production of our latchclips. This ensures that they are strong, durable, and resistant to corrosion.
- Testing Procedures: Each latchclip undergoes a series of tests before leaving our factory. These tests include strength tests, durability tests, and functionality tests. Only products that pass all these tests are approved for sale.
- Customer Feedback: We value our customers' feedback and use it to continuously improve our products. If you have any suggestions or concerns about our latchclips, please don't hesitate to contact us.
Conclusion
Ensuring a latchclip is properly locked is a multi - step process that involves pre - installation checks, proper installation, correct locking, and regular maintenance. By following these steps and using high - quality latchclips from a reliable supplier, you can guarantee a secure and long - lasting connection.
If you are interested in purchasing our latchclips or have any questions about our products, we encourage you to contact us for procurement discussions. Our team of experts is ready to assist you in finding the right latchclip solutions for your needs.


References
- General knowledge of mechanical engineering principles related to latchclips.
- Product manuals and specifications provided by our manufacturing facilities.
Send Inquiry