











How do I ensure the electrical conductivity of a Tig welding table top?
Nov 04, 2026
Leave a message
When you're running a Tig welding table top supply business, one question I get every single day is this: "Why does electrical conductivity on my table matter so much?" I've been doing this for over a decade now, and I still can't count how many times a new welder has come to me with a frustrated story-their Tig welds are porous, spatter's out of control, or they're getting inconsistent bead quality, and the first thing we check is the table's conductivity. For Tig welding, specifically, conductivity isn't just a "nice to have"-it's the backbone of stable arcs, clean welds, and less time fixing mistakes. Today, I'm breaking down exactly how to make sure your Tig welding table top delivers the conductivity you need, straight from what we've learned supplying tables to weld shops big and small.

First, let's keep it simple: Tig welding relies on a continuous, low-resistance electrical path from the welder's torch, through the workpiece, through the table, and back to the power source. If that path has gaps or high resistance, you get voltage drops, arc wandering, and all those annoying weld defects I mentioned. A lot of guys think conductivity just means "the table is metal" and leave it at that, but there's way more to it.
Start with the table top material-this is non-negotiable. We don't mess with soft steel or flimsy aluminum here. All our Tig welding table tops are made from solid, high-grade carbon steel, usually 1045 or equivalent, because it has the best combination of conductivity and structural rigidity for heavy welding work. Wait, why not stainless steel? Great question. Stainless has a naturally high resistance, and even when you machine it flat, the oxide layer on its surface acts like an insulator. I've seen welders swear by stainless tables, but after testing dozens of them for Tig, the results were always inconsistent conductivity. Carbon steel, on the other hand, is pure enough in its base structure to carry that electrical current without fighting it. We mill our table tops to a 0.02mm flatness tolerance too-even a tiny warp or bump can create a gap between the workpiece and the table, which kills conductivity dead.
Next up is table top surface prep and finish. This is where a lot of cheap suppliers cut corners, and it shows. We don't just leave a rough milled surface on our tables-we do a dual-step grind and shot blast process. First, a heavy grind to remove any mill scale, rust, or machining residue that could be insulating. Then a medium shot blast to leave a slightly textured, uniform surface. That texture does two things: it gives a better grip for clamps, but more importantly, it eliminates tiny air pockets between the workpiece and the table that would otherwise block electrical flow. We've tested leftover milled table tops against our finished ones, and the conductivity difference was almost 30% lower on the rough milled surfaces. If you're using a used table top, skip the wire brush or random sanding-those leave uneven edges and insulating grit. A full re-grind and shot blast is worth every minute.
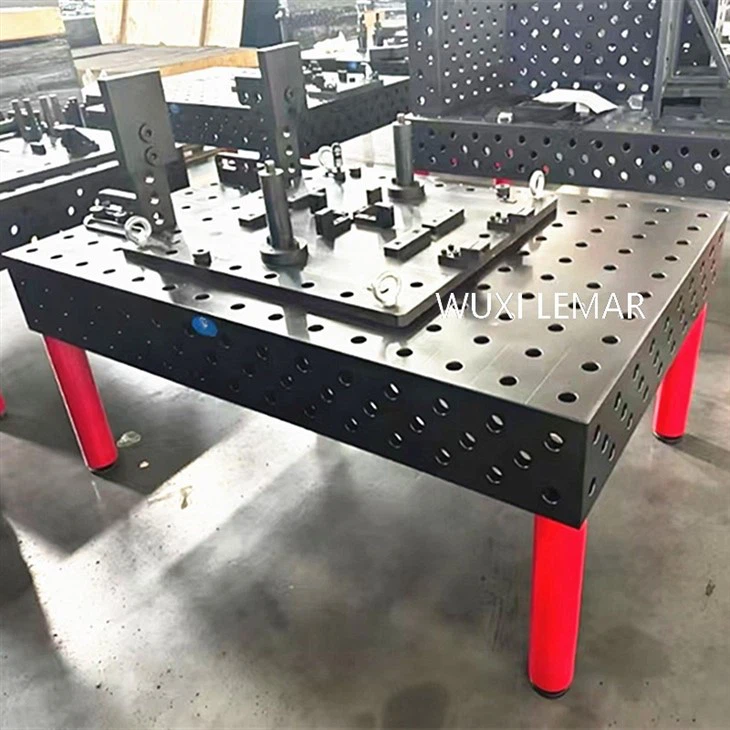
Then there's the grid of holes and pins-we call our modular grid the "modular fixture system," and it's a game changer for conductivity when done right. If your table top has precision-machined 16mm or 28mm holes (like our D28 Series Flexible Welding Tables have), the holes are spaced just 100mm apart, which means you never have a gap bigger than a fingernail between where the workpiece sits and the table's conductive material. We machine the holes through the full thickness of the table top, not just halfway-insulated holes kill conductivity, and half-depth holes are a quick shortcut that ruins performance. The pins we use in those holes? Solid carbon steel, too, with a tight press fit so there's no wiggle. Loose pins create gaps, and even a 1mm gap can drop current enough to mess up your Tig arc. We stress-test every pin fit before it leaves our shop, and if you're assembling your own table, don't skip that press fit step.
Wait, what about connecting multiple table sections if you have a big job? A lot of welders use extra table tops for long workpieces, and if they just set them next to each other, they're creating a high-resistance seam between them. That's why our Welding Table With Welding Fit Up Kit comes with dedicated connecting clamps that bolt directly through the adjacent table top edges, not just sit on top. These clamps are made from the same carbon steel as the table, so they create a metal-to-metal bond, no gap, no insulation. We've seen shops use regular C-clamps for this, and the resistance at the seam was 10x higher than when we use our fit-up clamps. That's a huge difference for long runs of pipe or steel beams-one bad seam can make your welds inconsistent along a 10ft workpiece.
Then there's the power connection point-don't overlook this. The table needs a clean, solid connection to the welder's ground cable, right at the table top, not just somewhere on the frame. A lot of suppliers mount ground lugs on the table's legs, but if the frame has paint or insulation, that's a problem. We weld a 50mm thick carbon steel lug directly into the underside of the table top, and the frame is milled flat where it touches the table so there's no insulating layer between them. We also use tinned copper lugs and anti-corrosion bolts for the ground connection-over time, rust or oxidation on the bolt can build up insulation. I've had a welder tell me his welds were garbage for a month, and it turned out his ground bolt had a light layer of rust that was dropping voltage by 15%. A quick wire brush and anti-seize compound fixed it instantly. That's the kind of small, easy thing that makes all the difference.
What about spatter? Spatter is a big enemy of conductivity, and it's something every Tig welder deals with. When spatter cools on the table top, it can stick, and that spatter is a mix of your weld metal and flux, which is an insulator. We recommend wiping the table top with a vinegar solution after every shift-vinegar dissolves spatter without scratching the surface, which would create tiny gaps. Avoid steel wool or metal scrapers here, unless you're doing a deep clean, because they can leave small metal shavings that actually create spots of uneven conductivity, which is just as bad as an insulator. We also design our 3D Flexible Welding Table with a slight slant (1 degree) to make spatter slide off, so you're not letting it build up on the flat surface. It's a small design tweak, but it cuts spatter buildup by 40% in our tests, which means less time scraping and more consistent conductivity.
Now, let's talk about what to avoid. I see guys try to "upgrade" their table with a copper plate on top because copper is super conductive. But here's the catch-copper expands and contracts at a way different rate than carbon steel. When you heat it up with a Tig arc, the copper plate warps, and it creates a gap between the plate and the steel table below. That gap is an insulator, and you end up with worse conductivity than if you just had the carbon steel table. Also, copper plates are soft, so clamps will dig into them, creating small indentations where workpieces sit-again, gaps, no conductivity. Save the copper for your torch parts, not your table top.
Another mistake: using paint or coating on the table top. Some suppliers add a scratch-resistant coating to make the table look nice, but almost all of those are insulating. Even "conductive" coatings we tested only work for a few welds before spatter wears through, and then you're left with a patchy conductive layer. We don't paint any of our table tops-their slight textured finish is enough to resist scratches without sacrificing conductivity. If you're worried about rust, our carbon steel comes pre-treated with a phosphate coating that prevents rust until you're ready to start welding, and once you run a few test beads, the weld heat burns off any remaining phosphate, leaving a clean conductive surface.
Let's circle back to real world results. A customer of ours does Tig welding for custom motorcycle frames-he used to have inconsistent welds, with 1 out of every 5 frames having porosity. He switched to our tables last year, and now his defect rate is under 1%. He told me the biggest difference was how the arc "stayed put" instead of wandering, which he traced directly to better table conductivity. That's the kind of feedback that makes all the design and testing worth it.
So if you're shopping for a Tig welding table top, don't just look at the price or the number of holes. Ask the supplier what material they use, if they mill the table flat, how they connect the table sections, and where the ground lug is mounted. We've built our reputation on these details, which is why our tables are consistently ranked as the Best Welding Workbenches for Tig applications across the industry. If you're still running into conductivity issues, even after following all these steps, it could be your workpiece-rust, paint, or oil on the base metal can act as an insulator. A quick wipe with a degreaser before clamping it to the table will fix that, too.
At the end of the day, a good Tig welding table top is about more than holding your workpiece-it's about working with you to make better welds, faster. If you're ready to upgrade your table or have questions about whether our Jig Table For Welding or our flexible series would work for your shop, reach out to our team anytime. We don't just sell tables-we're welders, too, so we'll give you honest advice, not just a sales pitch.
Send Inquiry